API
This section describes OLEM’s basic features and their associated MicroPython API.
Note: For now, all functions are contained in a single module named ‘olem’. This may change later on to have one module per feature group (one for all led functions for example).
Movement
OLEM has 3 holonomic wheels which allow him to move in any direction and to freely combine movements in (x, y, theta).
NB: OLEM does his best to follow your instructions but if he can detect the edge of the board or table, he will make sure not to fall.
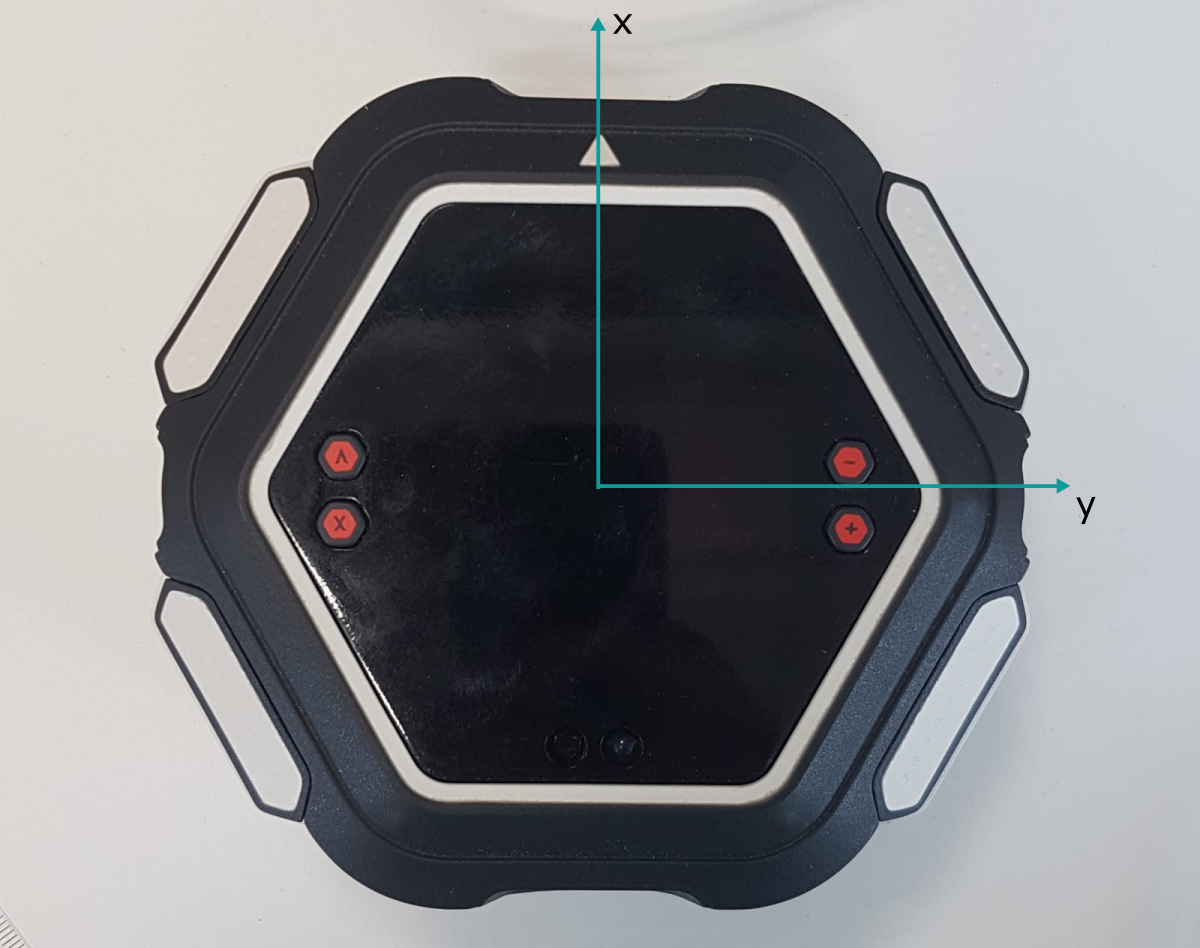
All functions related to movements. With the exception of wait_stop(), all functions are non-blocking.
Movements can be requested in the cartesian or the polar space.
Movements can be requested using the current position as a referential or the starting position.
"""
Move OLEM by the requested amount in cartesian space.

:param x: translation along x axis in mm
:param y: translation along y axis in mm
:param rotation: rotation in degrees
"""
move(x, y, rotation)

"""
Move OLEM to a position in cartesian space.

:param x: position along x axis in mm
:param y: position along y axis in mm
:param orientation: orientation in degrees
"""
move_to(x, y, orientation)

"""
Blocks until OLEM stops moving
"""
wait_stop_moving()

"""
Stop all movements
"""
stop_moving()

"""
Turn OLEM by the requested angle.

:param rotation: rotation in degrees
"""
turn(rotation)

"""
Turn OLEM to the requested orientation.

:param orientation: orientationin degrees
"""
turn_to(orientation)

"""
Move OLEM by the requested amount in polar space.

:param distance: distance in mm
:param direction: direction in degrees
:param rotation: rotation in degrees
"""
move_polar(distance, direction, rotation)

"""
Move OLEM to the position in polar space.

:param distance: distance in mm
:param direction: direction in degrees
:param orientation: orientation in degrees
"""
move_to_polar(distance, direction, orientation)

"""
Move OLEM in a direction

:param direction: in degrees from current orientation
"""
move_towards(direction)

"""
Set the movement speed for all movements.
NB: Default speed is 1.0.

:param speed: speed from 0.0 to 1.0
"""
set_move_speed(speed)

"""
Return speed from 0.0 to 1.0
"""
get_move_speed()

"""
Return x position in mm
"""
get_position_x()

"""
Return y position in mm
"""
get_position_y()

"""
Return orientation in degrees
"""
get_orientation()

"""
Check if OLEM is moving

Return True if OLEM is moving, False otherwise
"""
is_moving()

"""
Set the current position as (0,0,0) for all spaces.
"""
reset_position()
LED
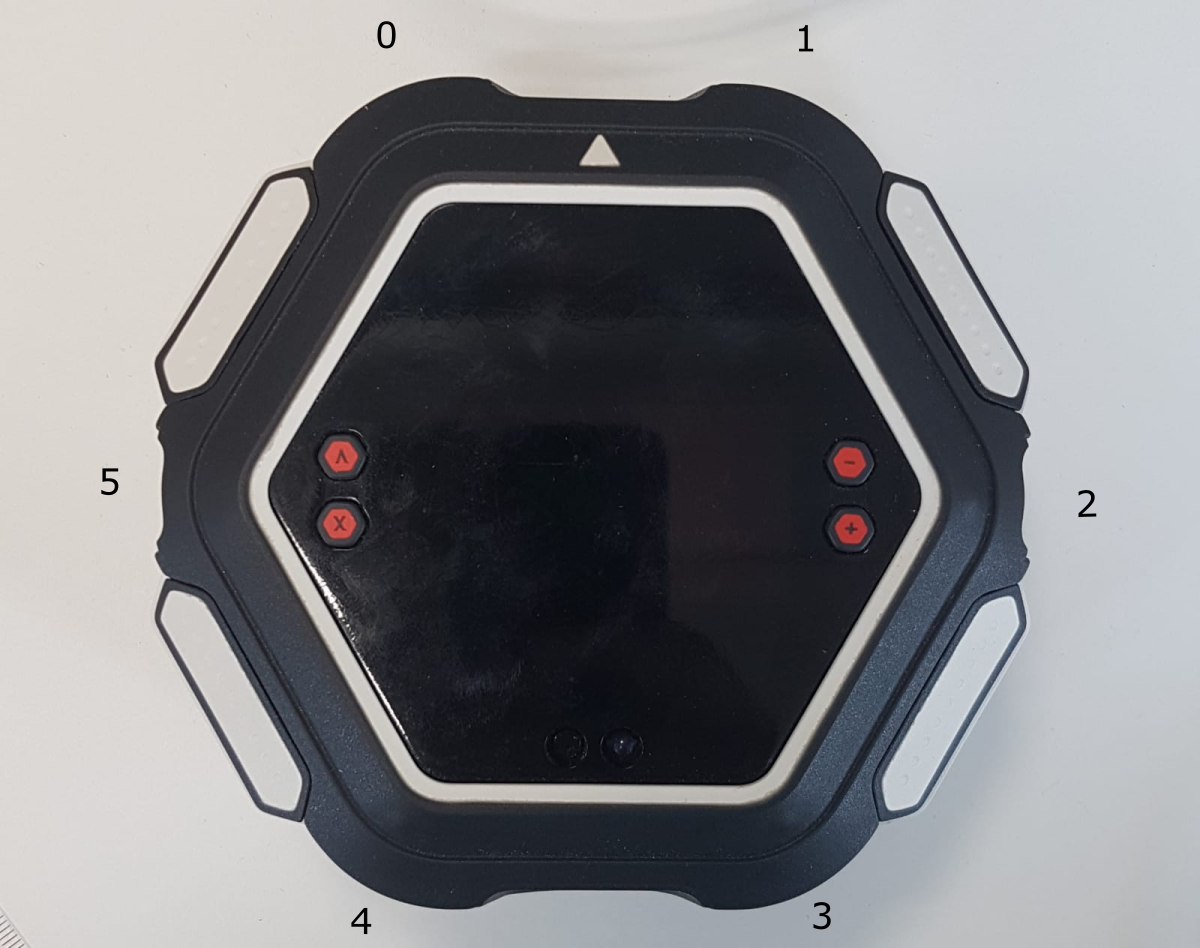
OLEM has a total of 6 RGB leds with 1 at each vertex. They can be used to light up areas under OLEM. Their index can be seen in the picture below:
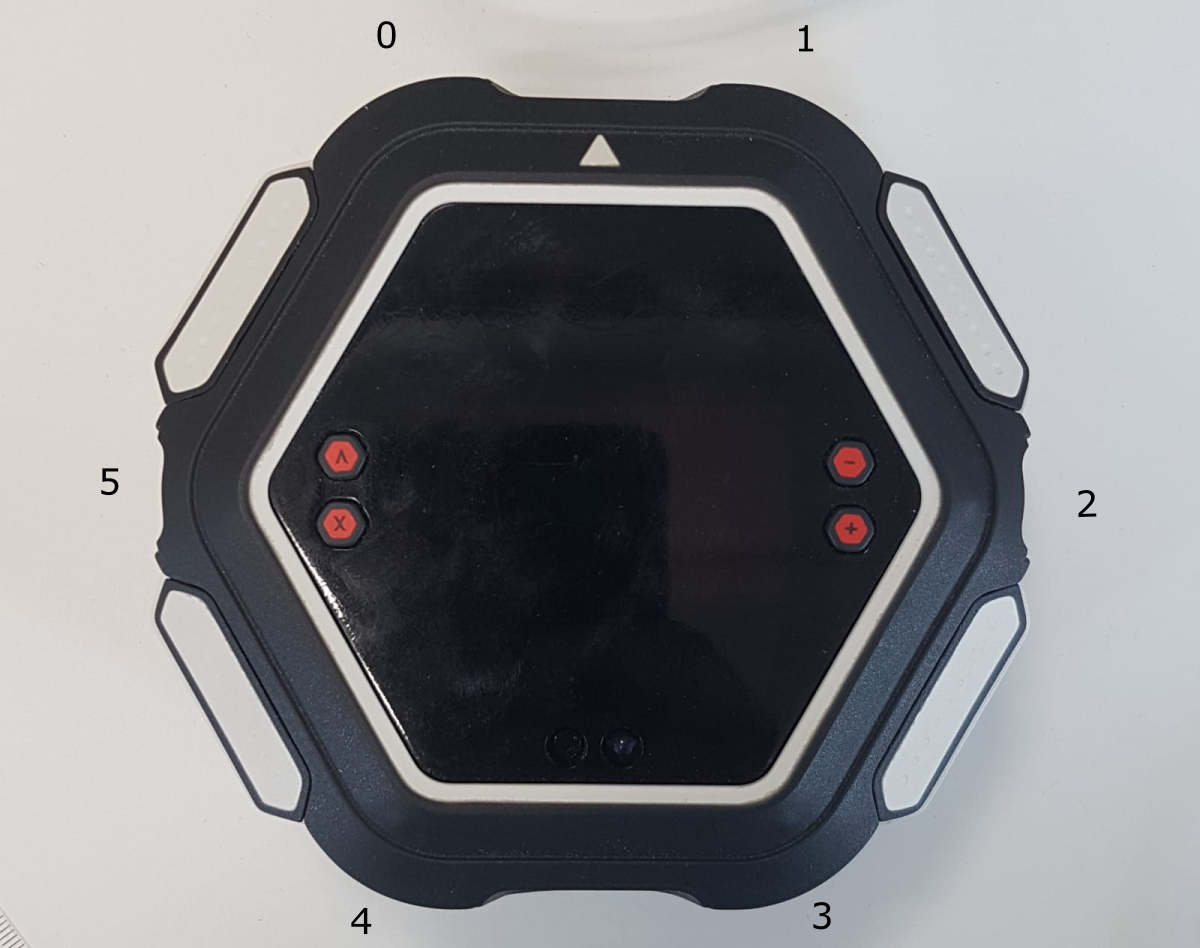
Each led can be controlled individually. For most functions, we use masks to select leds. The masks are on 6 bits, 1 per led, with bit n corresponding to led n. So a mask equal to 0x01 selects led 0 while a mask of 0x1A selects led 5, 4 and 2. The module comes with the following constants:
- LEDALL
- LED0
- LED1
- LED2
- LED3
- LED4
- LED5
Colors are specified as hexstrings in the format : “#RRGGBB” with black=”#000000” and white=”#FFFFFF”
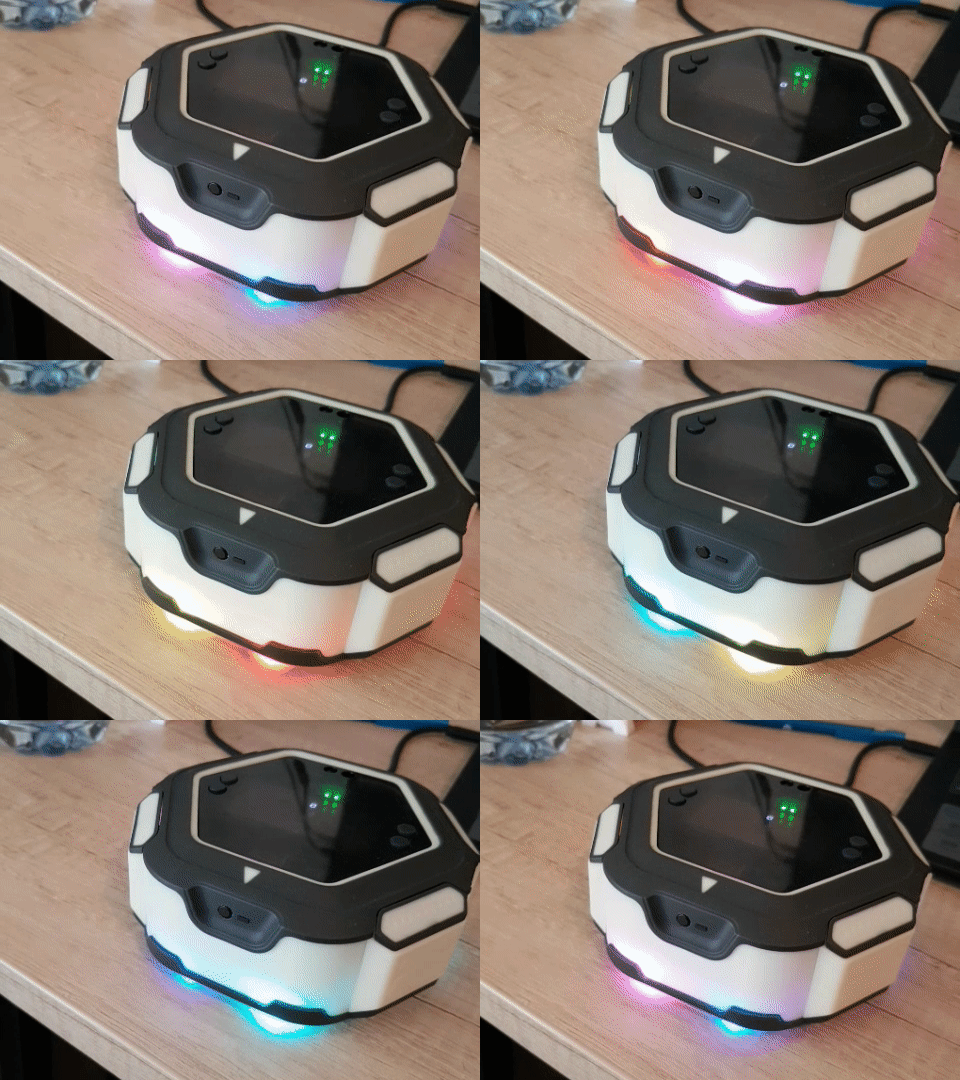
Various effects can be applied to the leds :
Blink alternates between 2 colors.
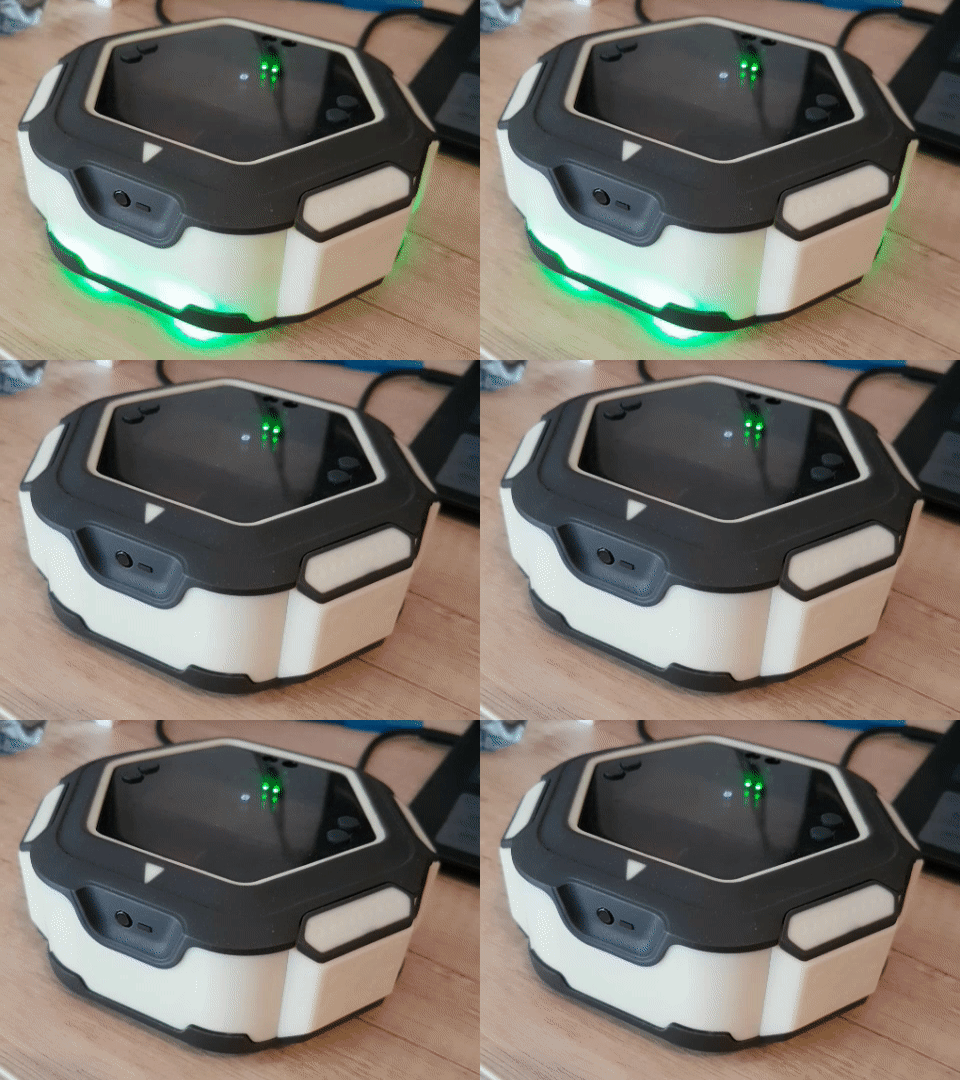
Transition is used to change the led color smoothly.
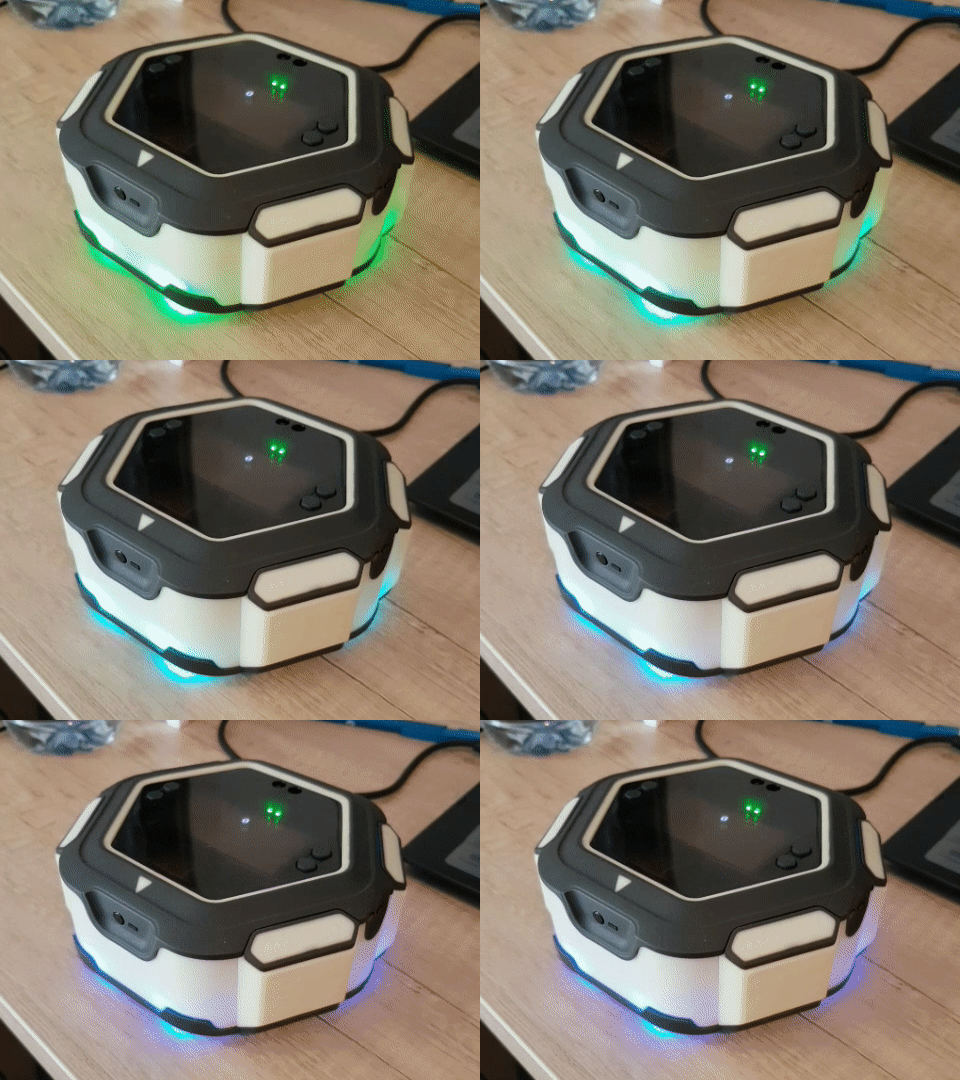
Pulse alternates smoothly between 2 colors.
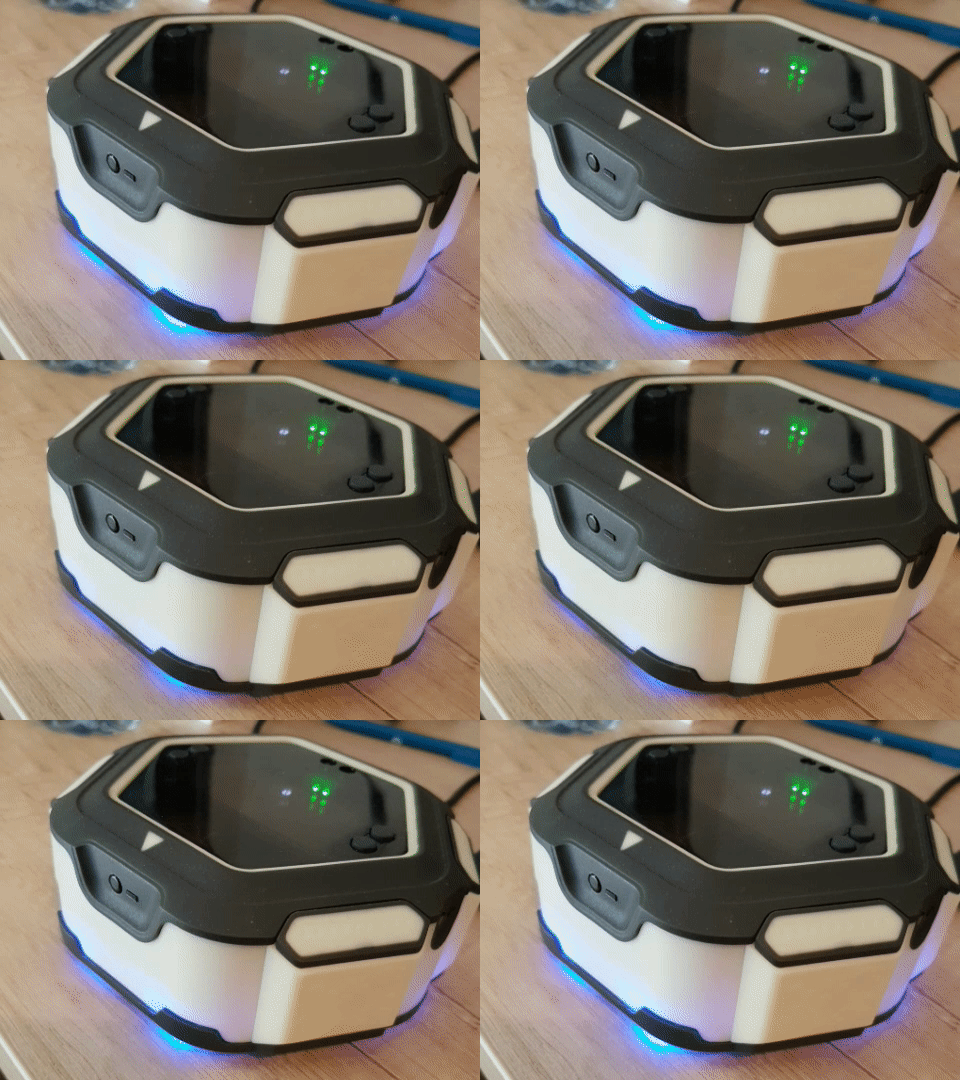
Flickering is used to add noise to a color.
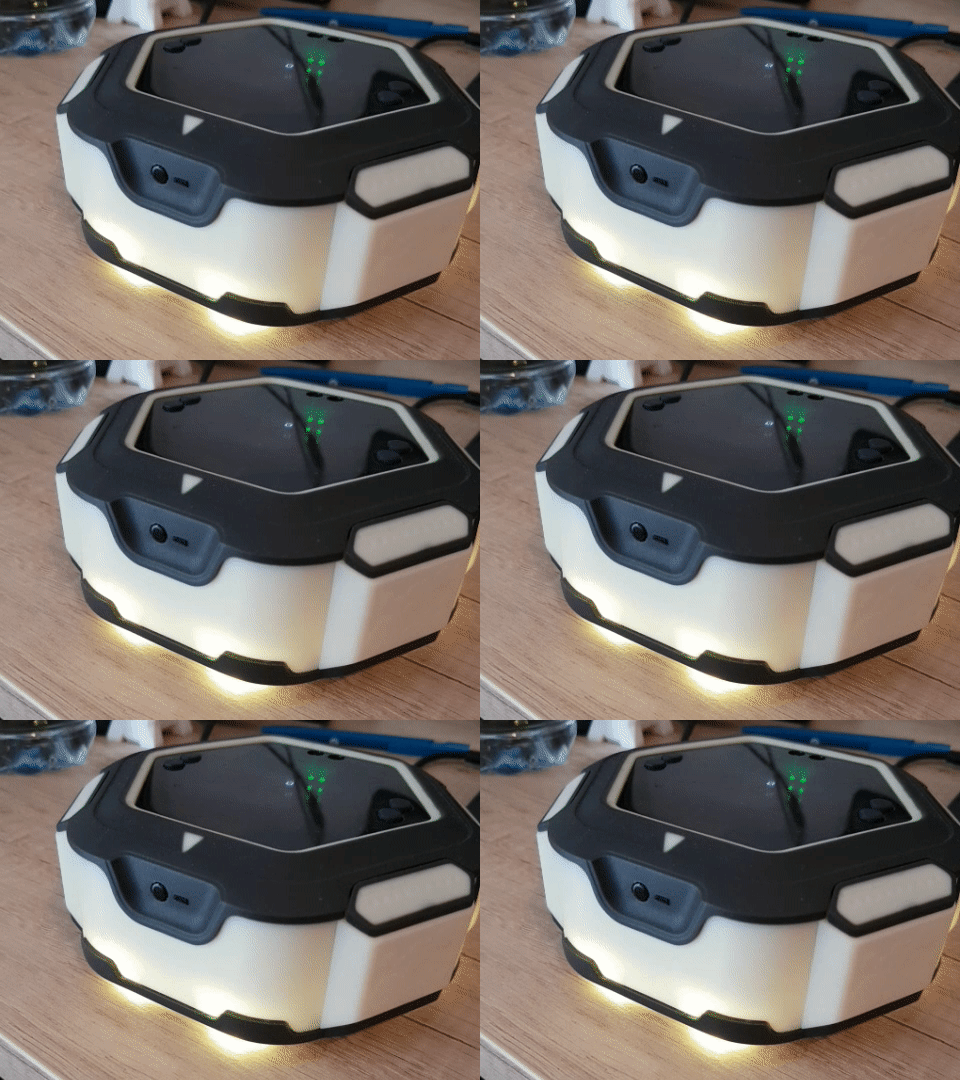
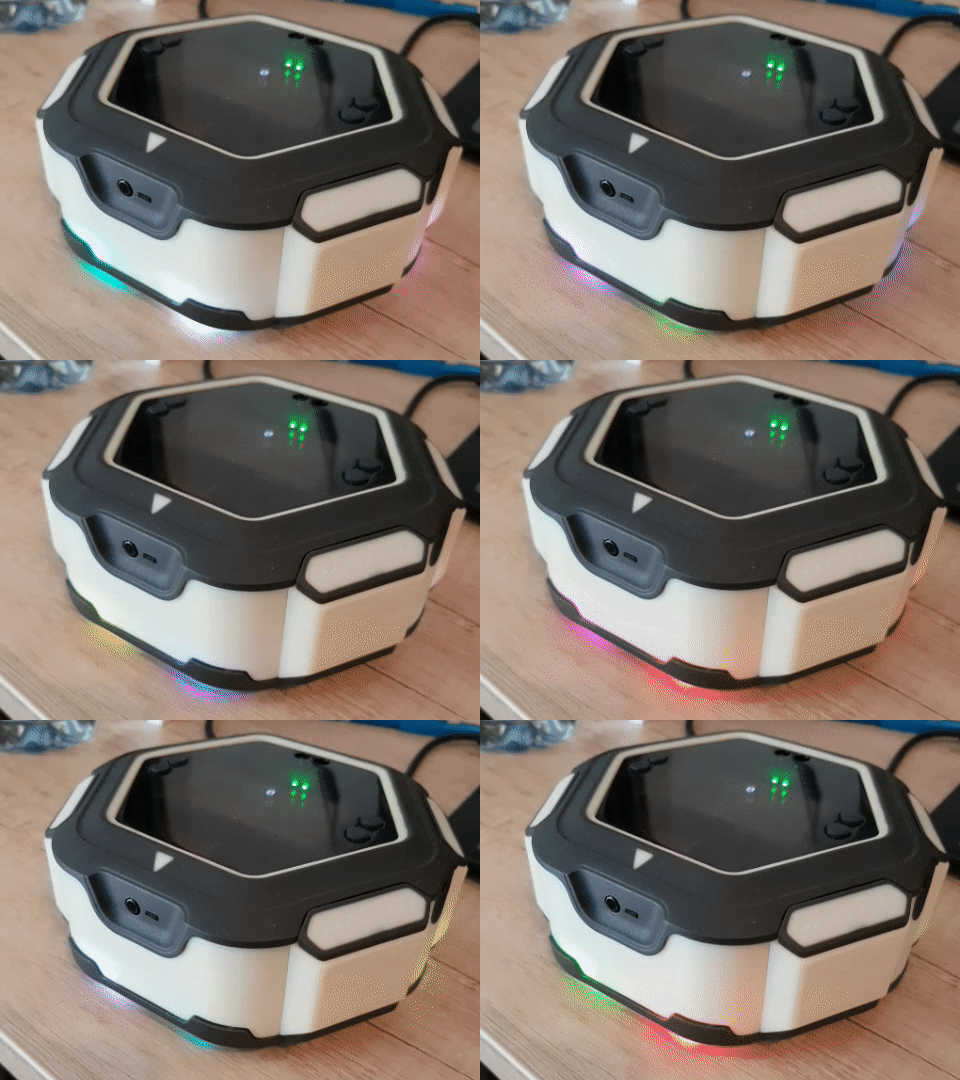
Shifting transfers the configuration of each led to its neighbour.
"""
Pulses led

:param mask: led mask with led n corresponding to bit n
:param period: pulsing period in ms
:param hexcolor: hexadecimal string color "#RRGGBB"
"""
led_pulse(mask, period, hexcolor)

"""
Blinks led

:param mask: led mask with led n corresponding to bit n
:param period: blinking period in ms
:param hexcolor: hexadecimal string color "#RRGGBB"
"""
led_blink(mask, period, hexcolor)

"""
Transition leds from their current color to a new one.

:param mask: led mask with led n corresponding to bit n
:param duration: transitioning duration in ms
:param hexcolor: hexadecimal string color "#RRGGBB"
"""
led_transition(mask, duration, hexcolor)

"""
Set leds color to a color

:param mask: led mask with led n corresponding to bit n
:param hexcolor: hexadecimal string color "#RRGGBB"
"""
led_on(mask, hexcolor)

"""
Turn off leds

:param mask: led mask with led n corresponding to bit n
"""
led_off(mask)

"""
Adds a flickering effect to leds. This adds noise to the led color.
Example :
    led_flicker(63, "#100020")
This will add +/- 8 to the red value of all leds and +/- 16 to the
blue value of all leds

NB: This has not impact on the other effects applied to the leds. For
example it can be used while the led is pulsing.

:param mask: led mask with led n corresponding to bit n
:param intensity: hexadecimal string color "#RRGGBB"

"""
led_flicker(mask, intensity)

"""
Turns off flickering for the specified leds

:param mask: led mask with led n corresponding to bit n
"""
led_flicker_off(mask)

"""
Periodically shift led configuration around OLEM.

:param period: shifting period in ms
:param direction: 0 for left to right, 1 for right to left
"""
led_shifting(period, direction)

"""
Turns off led shifting
"""
led_shifting_off()
Time management
"""
Passive wait.

:param duration: wait duration in ms
"""
delay_ms(duration)

"""
Return current time in ms
"""
get_time_ms()
Floor sensors
OLEM has 6 sensors constantly detecting the floor. They return a signal proportional to the color of the area directly underneath the sensor. With a white surface resulting in the strongest signal and a black one or no surface at all giving the weakest signal.
Their index can be seen in the picture below:
For convenience, the signal is already processed and the API can be used to check if :
- the floor is detected (aka we are on the board and not the edge)
- a card has been detected [Python API coming soon]
- A tile edge is detected [Python API coming soon]
- Get sensor value in percent
The module comes with the following constants:
- FRONT
- RIGHT
- BACK
- LEFT
"""
Checks if floor is detected in a direction

:param side: 0 for FRONT, 1 for RIGHT, 2 for BACK, 3 for LEFT

Return True if floor is detected, False otherwise
"""
ir_floor_is_floor_present(side)

"""
Get the sensor value

:param side: 0 for front left, 1 for front right, etc.

Return filtered delta value in lsb
"""
ir_floor_get_sensor_value(sensor)
Side sensors
The side sensors can be used to detect objects near OLEM. They can be seen up to 150 mm in a straight line from the sensor. [insert image of sensing area]
For convenience, the signal is already processed and the API can be used to :
- Check if a hand is in range
- Check if a game element is in range [May be deprecated]
- Get the sensor value in LBS or percent
The module comes with the following constants:
- FRONT
- RIGHT
- BACK
- LEFT
- FRONT_MASK
- RIGHT_MASK
- BACK_MASK
- LEFT_MASK
"""
Checks if a hand is detected in front of a side sensor
NB: A hand gives off a weaker signal than an obstacle

:param side: 0 for FRONT, 1 for RIGHT, 2 for BACK, 3 for LEFT

Return True if a hand is detected, False otherwise
"""
ir_side_is_hand_present(side)

"""
Checks if an obstacle is detected in front of a side sensor
NB: An obstacle gives off a stronger signal than a hand

:param side: 0 for FRONT, 1 for RIGHT, 2 for BACK, 3 for LEFT

Return True if a hand is detected, False otherwise
"""
ir_side_is_obstacle_present(side)

"""
Get the sensor value

:param sensor: 0 for FRONT, 1 for RIGHT, 2 for BACK, 3 for LEFT

Return filtered delta value in lsb
"""
ir_side_get_sensor_value(sensor)

"""
Get the sensor value

:param sensor: 0 for FRONT, 1 for RIGHT, 2 for BACK, 3 for LEFT

Return percent value, at 0 nothing is detected, at 100 an object is very close
"""
ir_side_get_sensor_percent(sensor)

"""
Set the low pass filter. A higher value means the sensor reacts slower but is more precise.

:param value: Number of samples used in filter
default value: 12
"""
ir_side_set_filter(value)

"""
Returns a bitfield with 1 bit per sensor indicating wether
a hand is present or not.
"""
ir_side_get_hand_mask()

"""
Returns a bitfield with 1 bit per sensor indicating wether
an obstacle is present or not.
"""
ir_side_get_obstacle_mask()
Top sensor
The top sensor is similar to a side sensor except it is … on top of OLEM. This means it will be sensing mostly player hands and can be used easily for user input.
As for the other sensors, the signal is already processed by our API and it is possible to :
- Get the sensor value in LSB or percent
- Check if a hand is in range
"""
Checks if a hand is detected on the top sensor
NB: A hand gives off a weaker signal than an obstacle

Return True if a hand is detected, False otherwise
"""
ir_top_is_hand_present()

"""
Get the top sensor value

Return filtered delta value in lsb
"""
ir_top_get_sensor_value()

"""
Get the top sensor value

Return percent value, at 0 nothing is detected, at 100 an object is very close
"""
ir_top_get_sensor_percent()
Game messenger
Data can be exchanged with a wireless device in a channel independent from the normal shell. The default use case is the mobile app during games but it can also be used to interact with a computer through the Command Center.
- Any message starting with ‘>’ will be handled by the game messenger.
- It can hold up to 10 messages in a FIFO.
- Messages can be up to 100 bytes long.
- The Alert (Bell, Beep) character ‘\a’ should NOT be used in print or game messenger strings.
"""
Blocks until a message is available for the game

Returns the message
"""
gmsg_wait_for_message()

"""
Blocks until a message is available for the game or until the end of the timeout

:param timeout: time to wait in ms

Returns the message if received or an empty string ""
"""
gmsg_wait_for_message_timeout(timeout)

"""
Sends a message to the app

:param message: string of max length 100 bytes
"""
gmsg_send_message(message)

"""
Delete all queued messages
"""
gmsg_reset_queue()

"""
Returns the oldest received message if any, or an empty string ""
"""
gmsg_get_message()

"""
Returns the number of messages waiting in queue
"""
gmsg_get_waiting_message_count()
Display
OLEM’s display is a LCD-TFT screen enabled with a capacitive touch panel. Its technical specifications are :
- 320*240px
- RGB565 colors which means that each pixel is stored on 2 bytes. Red and Blue are represented on 5 bits while Green is represented on 6 bits.
- (x=0, y=0) is top left of screen
The callbacks used with display components such as buttons are implemented as events stored in a queue. Each component can be associated to an id which is then added to the queue when the event is triggered. That queue can be read using the API.
"""
Display text on screen

:param text: string to display
:param font_size: olem.FONT_SMALL, olem.FONT_DEFAULT, olem.FONT_BIG
:param align: olem.ALIGN_LEFT, olem.ALIGN_CENTER, olem.ALIGN_RIGHT
return text lvgl object
"""
display_text(text, font_size, align)

"""
Display button on screen

:param text: string to display
:param event_id: integer that will be passed back when
event is triggered. 0 is prohibited.

return button lvgl object
"""
display_button(text, event_id)

"""
Display image from file

:param file_name: string path to file

return image object
"""
display_img(file_name)

"""
Display clickable image from file

:param file_name: string path to file

return image object
"""
display_img_button(file_name)

"""
Add a callback to be called on clicking on an element

:param obj: object to which callback should be attached
:param event_id: integer that will be passed back when
event is triggered. 0 is prohibited.
"""
display_add_event_cb(obj, event_id)

"""
Set object position to center of screen

:param obj: object to be centered
"""
display_center(obj)

"""
Delete displayed object

:param obj: object to be deleted
"""
display_del(obj)

"""
Delete all objects on screen
"""
display_del_all()

"""
Move object to a specific position on screen

:param obj: object to move
:param x: x coordinate
:param y: y coordinate
"""
display_set_pos(obj, x, y)

"""
Get coordinates of an object on screen

:param obj: displayed object

Returns an array [x, y] in px
"""
display_get_pos(obj)

"""
Get dimensions of an object on screen
NB: For this to work, the item must already be rendered on screen

:param obj: displayed object

Returns an array [width, height] in px
"""
display_get_size(obj)

"""
Set dimensions of an object on screen
NB: this won't resize images, just their container.

:param obj: displayed object
:param width: in px
:param height: in px
"""
display_set_size(obj, width, height)

"""
Blink object at specific period (half period is visible, other half is not)

:param obj: object to blink
:param period: blinking period in ms
"""
display_blink(obj, period)

"""
Stop blinking
:param obj: object to stop blinking
"""
display_stop_blink(obj)

"""
Change displayed text of a text object

:param obj:  text object to modify
:param text: new text to display
"""
display_set_text(obj, text)

"""
Change displayed image of an image object

:param obj:  image object to modify
:param file_name: path to new image to display
"""
display_set_img_src(obj, file_name)

"""
Move object to foreground

:param obj: object to be moved
"""
display_move_to_foreground(obj)

"""
Move object to a given layer

:param obj: object to be moved
:param index: layer index, 0 is background, foreground is number of elements in group - 1
"""
display_move_to_layer(obj, index)

"""
Block until next frame is displayed
"""
display_wait_for_next_frame()

"""
Take the display mutex to prevent rendering.

This can be used to force rendering to wait
for all objects to be created and configured
before performing its task.
"""
display_mutex_take()

"""
Release the display mutex to allow rendering
"""
display_mutex_give()

"""
Create a QR code object

:param size: size in pixels
:param data: string data

Returns QR code object
"""
display_qr_code(size, data)

"""
Change data displayed by a QR code

:param qr_code_obj: QR code object
:param data: new string data
"""
display_set_qr_code_data(qr_code_obj, data)

"""
Get the oldest event callback triggered.

Returns the event id or 0 if no event has been triggered
"""
display_get_event()

"""
Clear all events queued
"""
display_clear_events()

"""
Blocks until an event is triggered or timeout is reached

:param timeout_ms: maximum time to wait in ms

Returns the event id or 0 if no event has been triggered
"""
display_wait_for_event_timeout(timeout_ms)

"""
Blocks until an event is triggered

Returns the event id
"""
display_wait_for_event()

"""
Change the background color

:param color: hex string, e.g, "#E8F8EC"
"""
display_set_bkg_color(color)

"""
Change text color

:param obj: text object created with display_text
:param color: hex string, e.g, "#E8F8EC"
"""
display_set_text_color(obj, color)

"""
Change default text color, won't apply to objects that already exist

:param color: hex string, e.g, "#E8F8EC"
"""
display_set_default_text_color(obj, color)
Preparing images
Later on we will handle other formats, for now, the only supported format is the one generated by https://lvgl.io/tools/imageconverter in V8
To generate the image file :
- Prepare the image by setting it to the size it will have on screen (screen is 320*240px)
- Set version to: LVGL v8
- Select Color format: CF_TRUE_COLOR_ALPHA or CF_TRUE_COLOR
- Output format: Binary RGB565
- Convert it
Now the output image can be used.
Localization
"""
Get system language as a 2 letters ISO code
"EN" for English
"FR" for French
"""
get_sys_language()
NFC
The NFC sensor is positioned under OLEM between the two front wheels. It can be used to read data from tags when going over them. When NFC detection is enabled, OLEM reads any tag he comes across and stores the data in a FIFO which is accessible using the API below.
- The FIFO can store up to 3 cards
- When a card is detected, a timestamp is registered and is stored along the card data in the NFCCard object
- Currently, only tags NTAG type 2 are supported (ISO/IEC 14443A). They are generally sold as NTAG2xx.
"""
Enables NFC detection
"""
nfc_enable()
"""
Disables NFC detection
"""
nfc_disable()

"""
Get the number of NFC cards that have been detected and haven't been processed

Returns an integer
"""
nfc_get_number_of_cards_waiting()

"""
Get the oldest card detected

Returns a string containing the data read from the card
"""
nfc_get_card_data()
Extension module
Olem has 4 extension slots, 2 of which are equipped with a connector that can be used to add new features to OLEM that require electronical components. The connectors have 4 pins :
- P1 and P2 carry logicial signals
- P3 is GND
- P4 is 3V3 and can provide up to 300 mA
The pins from all slots are connected, which means that P1 of one extension slot is connected to P1 of the other extension slot (and so on for all Px).
Extension modules can be used in GPIO or I2C mode.
The modules comes with the following defines:
- EXTMOD_GPIO
- EXTMOD_PWM
- EXTMOD_I2C
"""
Initialize the extension module manager and associated
hardware in the specified mode. Both mode cannot be used
at the same time.

:param mode: can be GPIO, I2C or PWM
"""
extmod_mode_set(mode)
GPIO mode
In GPIO mode, P1 and P2 can be controlled as simple GPIO in output mode. In that case, P1 is GPIO1 and P2 is GPIO2.
The modules comes with the following defines:
- EXTMOD_GPIO1
- EXTMOD_GPIO2
- LOW
- HIGH
"""
Set the logical output of the gpio to the specified value

:param gpio: can be GPIO1 or GPIO2
:param value: can be LOW or HIGH
"""
extmod_gpio_set(gpio, value)
PWM mode
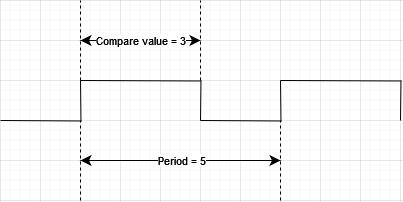
In PWM mode, P1 and P2 can be used to output signals with varying duty cycle and periods.
The modules comes with the following defines:
- EXTMOD_GPIO1
- EXTMOD_GPIO2
"""
Set the PWM values.
NB: current mode must be PWM

:param gpio: can be GPIO1 or GPIO2
:param period: period in ms. When period is 0, the output always stays LOW. Must be an integer.
:param compare_value: Controls the duty cycle. The signal stays HIGH for that number of ms in a period, must be an integer.
"""
extmod_pwm_set(gpio, period, compare_value)
I2C mode
In I2C mode, P1 is assigned to SCL and P2 is assigned to SDA.
"""
Read data from i2c bus

:param addr: address of slave device
:param length: number of bytes to read

Returns an array of bytes
"""
extmod_i2c_read(addr, length)

"""
Write data to i2c bus

:param addr: address of slave device
:param data: array of bytes to write

0 for success
"""
extmod_i2c_write(addr, data)